EXPERT BOOT FITTING AT SNOW+ROCK
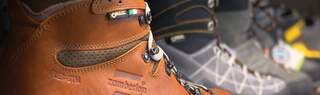
If you're going to invest in a pair of walking boots, you need to make sure they fit. Seems obvious enough. But choosing walking boots is much more than choosing the best-looking pair and picking up your usual size. Different types of footwear have different benefits to suit various activities: for example, lightweight shoes for fast-paced hiking or trail running, compared to extra durable, crampon-compatible boots for winter mountaineering. Our in-store experts have been out there and done it all, and are trained to work with you to select the right pair of boots and find your perfect fit. Get ready for miles and miles of unmatched comfort.
Step 1: Establishing Your Needs
First, our experts will ask you about your activities and find out any possible fitting issues which will help them find the best boots for you. We'll also help you choose some technical socks, if you don't have any with you.
Step 2: Taking Measurements
Step 2 is to measure your foot length, width and heel-to-ball, which we use to locate your flex point. We take these measurements seated and standing, so we can compare these results and work out how much the arch of your foot collapses when walking. Excessive arch collapse can cause your foot to elongate as you walk, which causes your toes to hit the end of the boot. If this is the case, we'll find you a footbed to provide extra support and lock your heel into place.

Step 3: Finding The Right Boot
Your expert boot fitter will recommend two or three pairs of boots and bring them to you to try. We'll show you how to lace them for the best suport and check the fit.
Step 4: Volume and Foot Movement
Once the boots are laced up, we’ll ask you to take a walk around the store to see how they feel – we’re looking for a snug fit, but not so tight that they’re uncomfortable.
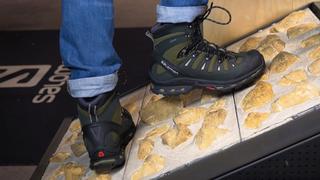
Next, it’s up on to the rough-terrain incline board. On the uphill it’s all about making sure that your heel is locked firmly into place and that there’s no lateral movement of the foot inside the boot. On the downhill we’ll ask you to pay particular attention to your toes. If you find that they’re pressed right up against the end of the boot then it could be that a heel-lift or volume reducer is necessary to improve fit.
The last stage of the fitting process is checking for excess volume on the smooth incline board. We’ll ask you to stand with your toes pointing up the gradient and gently squeeze the top of the boot, across the laces – here we’re looking for a comfortable 1cm air gap. Again, a heel-lift or volume reducer can be used to improve fit where necessary.
Once you get your new boots home, you should wear them for 4 hours around the house to simulate a 3-4 mile walk in the hills. If your boots are still comfortable after that, they're a good fit. If you find they're at all uncomfortable, you can bring them back to us for more adjustments, or return them for a refund within 30 days. We won't be able to refund them if you've worn them outside.
Let us know you agree to cookies
We use marketing, analytical and functional cookies as well as similar technologies to give you the best experience. Third parties, including social media platforms, often place tracking cookies on our site to show you personalised adverts outside of our website.
We store your cookie preferences for two years and you can edit your preferences via ‘manage cookies’ or through the cookie policy at the bottom of every page. For more information, please see our cookie policy.